My friend Linda invited a group of us to a Pinterest party at her house on Saturday. She had already planned to make a craft for her husband for Valentine’s Day and decided others should join in and make those Pinterest projects we never have time for.
Can you believe I was at a loss? I scoured my Pinterest boards and there wasn’t even one thing I could make in an afternoon. I think I see now why I don’t get many of them done.
So, I went scouring for Valentine’s Day themed projects and decided to do these Sweetheart Topiaries.
Source: naturallyestes.com via Amy on Pinterest
Cute, eh?
The site I pinned them from didn’t have detailed pictures to make it so I thought I’d share.
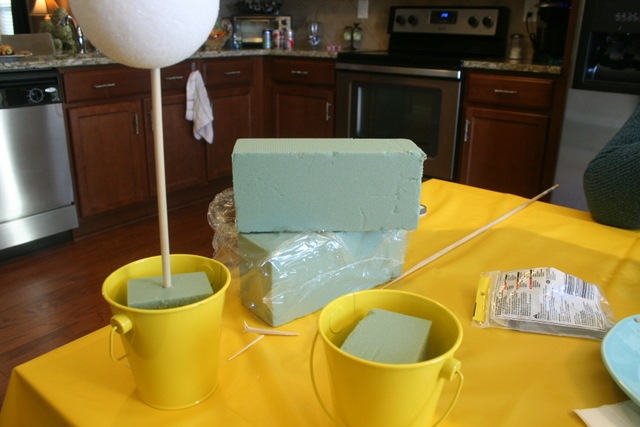
Our supplies:
- Buckets. Ours were 4 1/2” tall and 4” wide
- Foam for the base
- 4” Styrofoam balls
- 3/16” dowel rods
- Candy hearts
- Coordinating ribbon
- Hot glue
- Ice (you’ll see what I mean)
We had a rough time figuring out the ratios of bucket width to dowel rod width to Styrofoam ball width but I think what we went with worked well.
We had planned to buy metal buckets and paint them but were able to find some painted ones that worked. Looking back, I wish I’d had the pink like in the picture but lots of colors work and it’s easy to switch out the buckets after the fact.
First, we cut the foam down to squares to stuff in our buckets. These hold the dowel rods in place.
Next, we karate chopped the 3’ dowel rods to get them to the size we needed. Scott says we should have used a saw but I didn’t pack a saw for Linda’s house, so we had to improvise. The rods need to be about 13” long after you karate chop or saw them.
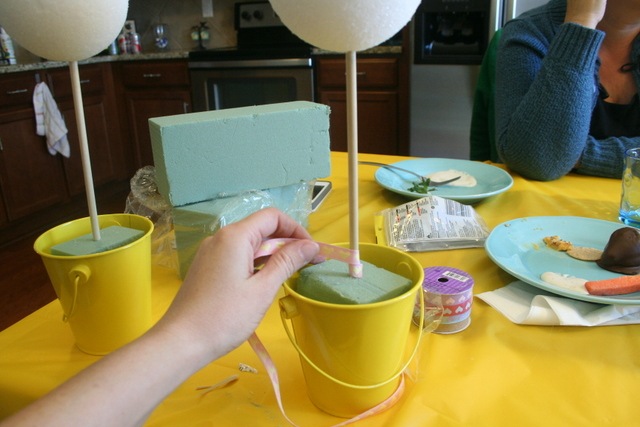
Put the rod into the foam in the bucket, trying to make it as straight as possible. Then, attach the Styrofoam ball to the top of the dowel rod, leaving about 6” of rod sticking out. There is no trick to getting it all straight and that is probably the hardest part of this project.
Next, we wrapped some coordinating ribbon around the dowel rods. Pro tip from our friend Joy that was there: take the rod out of the foam in the bucket and twirl the ribbon. Makes it much easier. Thanks, Joy!
I also would suggest hot gluing the ribbon every few swirls as it wants to sag and gap if you go too far.
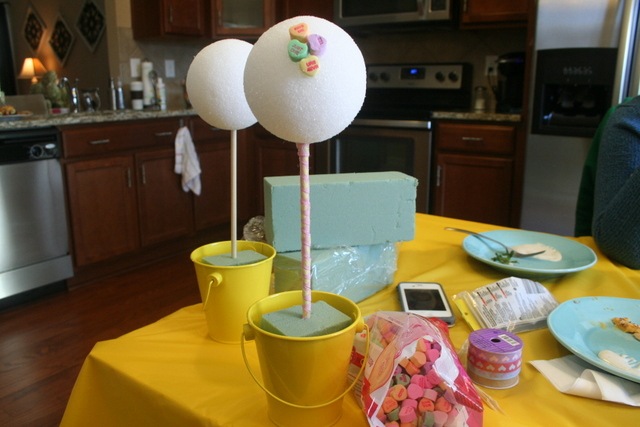
Now, the fun part. Start hot gluing the candies to the ball. Tip: don’t apply the glue to the ball first. The foam melts. Put the glue on the candy and then situate the candies around each other, making sure to evenly distribute the colors and the angles.
Also? This is the part where you might need the ice. I burned myself badly at least 3 different times as I was trying to get the glue on the little hearts. I still have two blisters as I type this. As Joy said, the real thing that needed blogged is a video of me trying to hot glue these things. It still hurts thinking of it.
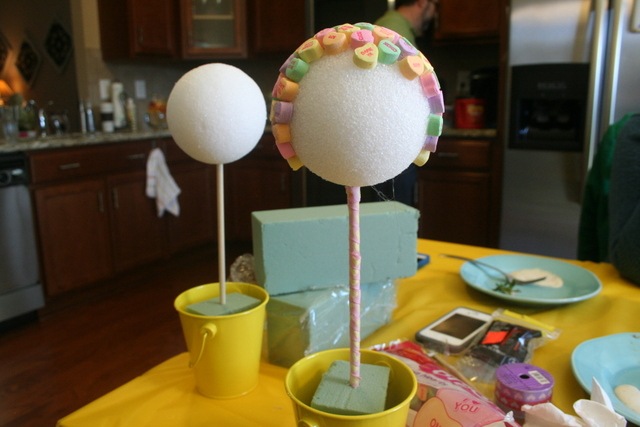
If you do this right, at some point, your ball will look like a woman in curlers.
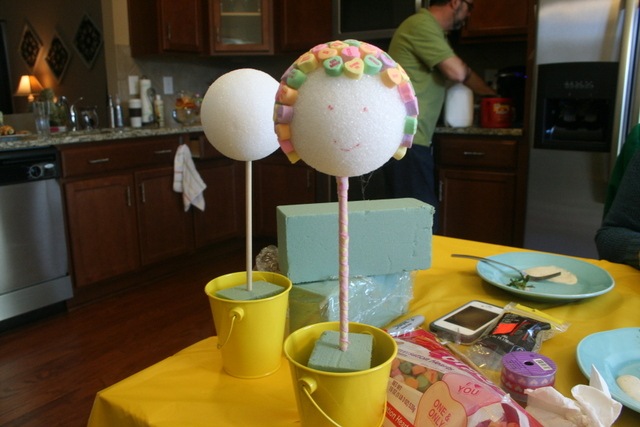
And then you can color a face on her.
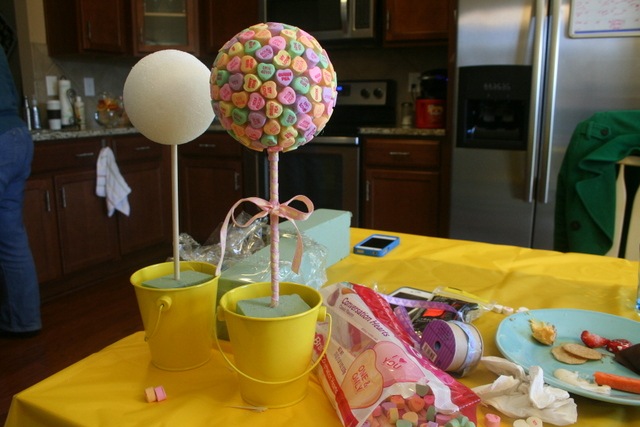
About an hour later, you will have all the hearts glued. Seriously. It took almost an hour to do that.
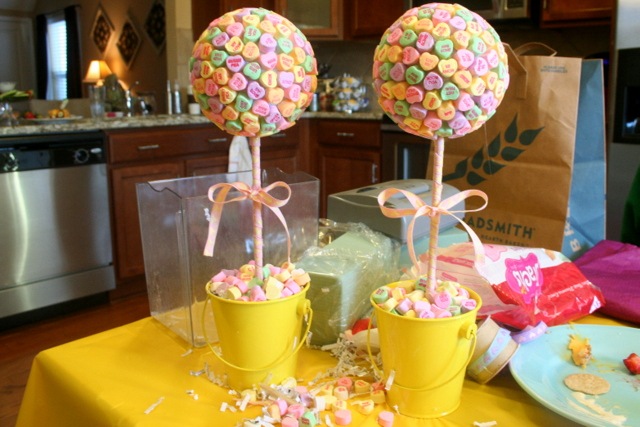
Next, tie a bow on the rod. If you have a Joy at your party that ties better than you, have her do it. It worked out well for me.
As a final step, we stuffed some paper in the sides of the bucket to fill the gaps and then poured the leftover candy hearts on top When you get home, your dog will enjoy his new candy dish. Thanks for eating my Valentine’s Day craft, Tucker!
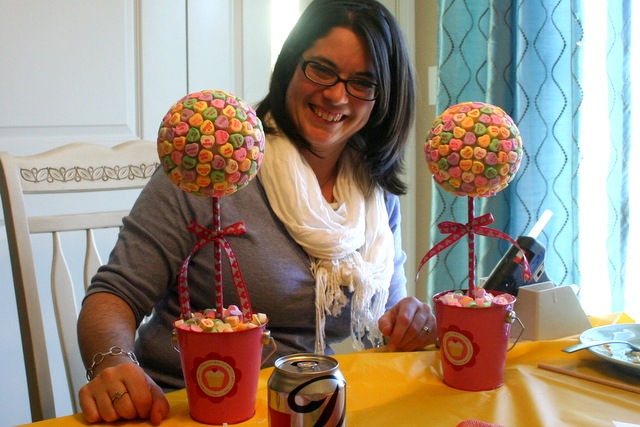
Jenny did the same craft but with red as her theme and I think it looks darling and way more Valentine’s Day-y.
And that’s it!
The two topiaries took us a total of 2 hours. I admit, I would never sit down for two hours and do these but it was a great Pinterest Party craft! I’m very happy to say that these will NOT end up on Pinstrosity so I’m considering it a win!

These are so super cute! Love them 🙂 I think it’s funny that Tucker ate some though…I can picture Jackson doing the same thing if I made one!
Stacey recently posted…The Mighty 8th
Oh my goodness, he’s a mess. I had to REFILL the candy because the foam was showing again. Ugh!